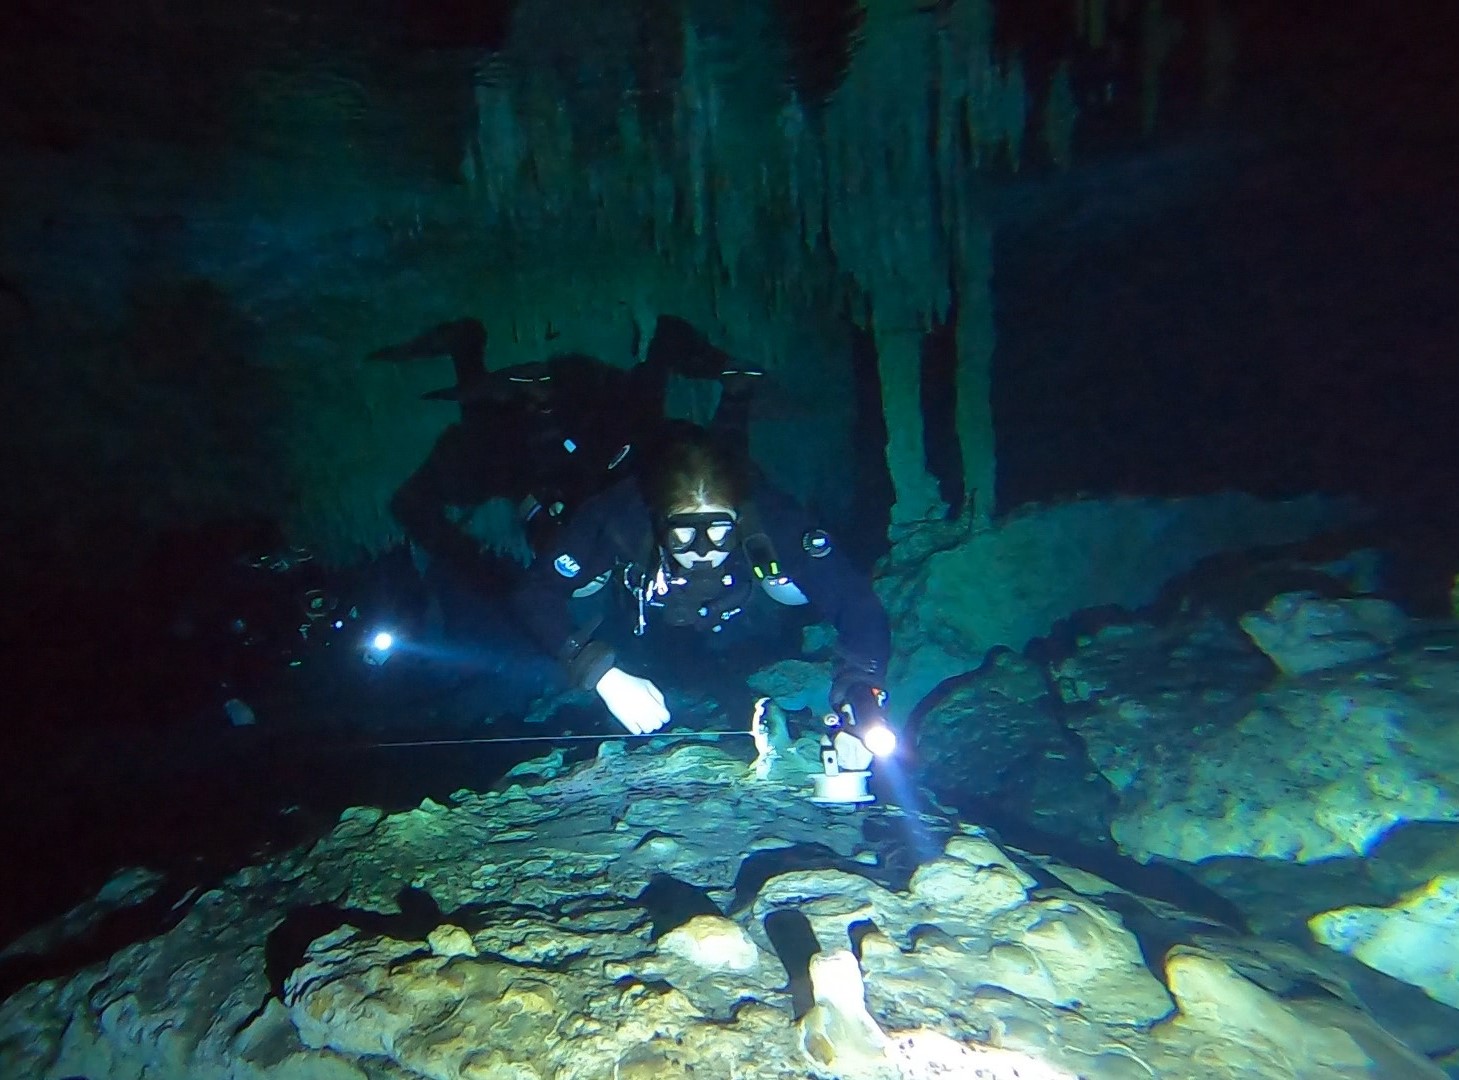
So, you just passed your open water class, or maybe you even have a few specialties under your belt. You might even be an advanced cave diver looking to get through some restrictions. Whatever the reason, you've come to the right place. While it may have standardized in the past decade, there are a lot of opinions floating around on the who, what, when, where, why, and how of sidemount diving.
Our goal today is to get you comfortable with some sidemount terminology and guide you down the path to becoming a sidemount diver, no matter your current diving level. We’ll be covering equipment, configurations, methodologies, and all the extra bells and whistles.
Benefits of Sidemount Diving
Before we really dig into sidemount diving, let's take a look at some of the pros of this configuration.
Easy to Carry Heavy Tanks
Does this scene sound familiar: You sweatily schlep your tanks to the boat, beach, or dock after you put your drysuit and undergarments on. Now you get to wait for your buddy to put his hood on, all while your black drysuit is absorbing the sun’s rays and heating you like a frozen dinner. If you’re lucky you’ll get distracted by the constant sloshing around on the boat. Super fun, right?
In sidemount, you can move your tanks close to or into the water before you get suited up thanks to the unique ability to put your harness on without your tanks.
Tanks Change, The Harness Stays On
Building on the previous point, the ability to don your harness without cylinders attached offers many advantages. It’s nice when moving tanks short to medium distances, you can move your tanks before you get into your exposure gear and harness.
When boat diving you can put on your harness and be ready to sling up your tanks quickly when you arrive at the dive site. In rough waters, you can hand up your tanks to board the boat or hang them to a jon line and don or doff them more easily.
More Balance, No Turtling

The freedom gained with complete underwater stability, some proper training, and time in the water is what most sidemount divers rave about. For those non-tech divers out there, because the positioning of the tanks is above and behind the diver, when the diver tilts side to side it is easy for the tanks to get off the center of mass and roll the diver to their back, making them face up instead of down. With sidemount positioning, even with steel tanks, it becomes impossible or very hard to get off balance.
Easier Valve Drills
Unlike manifolded doubles that require you to do some stretching, if you are even able to reach them, sidemount tanks are tucked by your armpits. This means that you can easily manipulate the valves. You can even flutter your valve if a reg failure were to occur.
Easy To Obtain Tanks
Diving sidemount also means you’ll have an easier time getting tanks in remote areas. Oftentimes only yoke tanks will be available to you. You can usually get used din-to-yoke adapters and two left-handed valves. While it can take a few dives to get used to it, in remote areas that may be the only thing available to you.
Drawbacks of Sidemount Diving
Even though we’ve been singing the praises of sidemount diving, some definite cons balance out the pros. Check them out to see if they move the needle on your decision in one direction or another.
Bad for Boat Diving
One notable disadvantage of sidemount diving becomes very apparent when you’re on a boat. While you have trimmed down your profile vertically in the water. You make yourself much wider than if you just had a set of backmounted doubles. This can be particularly frustrating for divers around you when trying to gear up. It may also be difficult on the ladder with your wider profile.
Sidemount Diving is More Complicated
The requirement of regulator switches at every predetermined pressure or time creates an added complexity to your baseline level of diving. Until you are proficient with sidemount diving, these added tasks can quickly become overwhelming.
Harder to Get Setup and Trimmed
Relative to the harness for backmounted doubles, particularly one-piece harnesses, lots of sidemount harnesses have separate shoulder and lower back plates along with a weight system that you can adjust to suit different lengths. That can increase your setup time before a dive.
Not Always Suitable For a Standardized Team Setup
Because of all the variations in harnesses, tank, and regulator configurations, and the fact that everyone is used to their particular way of diving, it is much harder to completely standardize a team. Compared to backmounted doubles where the DIR method has become the industry standard and while small variations exist, any divers who know the configuration can use it and understand it blinded underwater.
Equipment
If you've decided that sidemount is right for you, it's time to get your equipment in order. Below we’ll take a look at the ins and outs of sidegmount diving gear.
BCDs
We’re well beyond the days of jury-rigging a harness together with a car tire inner tube and a stop sign. You can find many off-the-rack BCDs online or at your local dive shop, each with its advantages and disadvantages. What we can say for sure is that all BCDs will have some variation of the following components: wing, harnesses, bungee system, and weights.
Wings
Just as in back-mounted doubles, there are different wing shapes and capacities to fit your sidemount needs.

What we call Florida-style wings typically have a high lift capacity to accommodate steel primary cylinders and run the full length of the back.
Mexican-style wings, on the other hand, have a lower lift capacity and are great for recreational diving, diving with all aluminum cylinders, or diving under tight restrictions. The wing typically sits on the lower back with the upper back remaining exposed or covered by a hard abrasion-resistant material.
There are a lot of wing capacities available, from 27 to 42 lbs of lift. When selecting a BCD it is important to know the type of diving you will be doing to determine the amount of lift required. For example, if you are technical (tech) diving with steel primary cylinders and multiple aluminum stages, you may be best served by a high-capacity wing.
If you are or plan on tech diving with your sidemount harness, consider getting a redundant bladder for a backup source of buoyancy. This is particularly important if you are tech diving in a wetsuit.
Some BCDs come with removable or replaceable wings. As of 2024, XDeep’s sidemount line is a perfect example of this. The classic wing is completely removable underwater without removing the harness, giving you the ability to slim yourself down when passing through tight restrictions. Their recreational (rec) and tech wings, however, are not removable underwater but you can exchange them on the surface as they are not sewn into the harness. Allowing you to have the optimal wing for your diving needs.
The placement of dump valves and inflators is also something to note. Commonly for sidemount, the inflator is placed on one side of the BCD, then wrapped under the armpit and across the chest. Dump valves are normally placed at the bottom of the wing, but can be placed on the top with a shoulder dump cable.
When tucking the wing to your body, some require bungees to secure the ends of the wing. Others keep a lower profile and only require the attached harness.
Harnesses
The next piece of equipment we’re going to look at is harnesses.
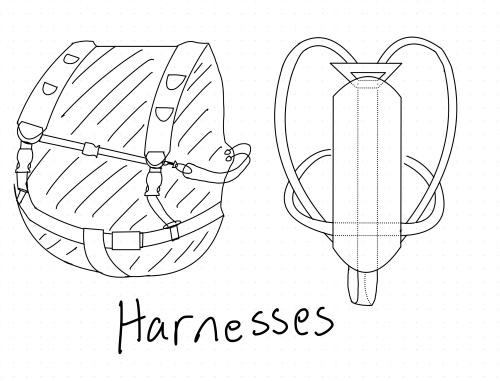
Harnesses can be broken down into the following components:
Detachable Wing
Some harnesses have wings that you can remove underwater without taking off the harness. On other systems, you can re-web or replace the wing with a little work on the surface to ensure you are using the correct wing for whatever environment you are diving in.
Harness Stiffness
One of the nice things about not having a single webbing harness is that you can have a soft crotch strap without compromising harness integrity. Harnesses can have one, two, or three different webbing stiffnesses with the stiffest being the waist strap, followed by the shoulder straps, and the softest being the crotch.
D-Ring Placement
Whether you're using sliding D-rings for aluminum cylinders, attaching decompression/stage bottles, or affixing any other accessory to your harness, the placement of D-ring, sliders, bars, and other attachment points matters. Bent D-rings are commonly placed over each buttcheek. They allow things like a gear pouch, deco/stage tanks, reels, spools, or other equipment to be placed without getting in the way.
Butt-Plate Capability
It is commonplace for divers diving with steel tanks to be diving them on the rails of a butt-plate. A butt-plate also allows for plenty of reel estate (puns!) for spools and whatnot.
Quick Release
As of this writing (the blistering summer of 2024), there is a lone piece of gear that has quick-release buckles, XDeep’s rec harness.
Weight Placement
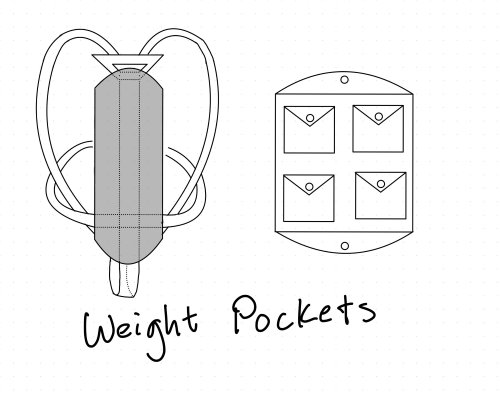
The standard weight placement is along the center spine. This ensures a centrally-located center of mass. A specialized plate that sits along the back can also be used to store weight.
Bungee Systems
There are two main styles of bungees:
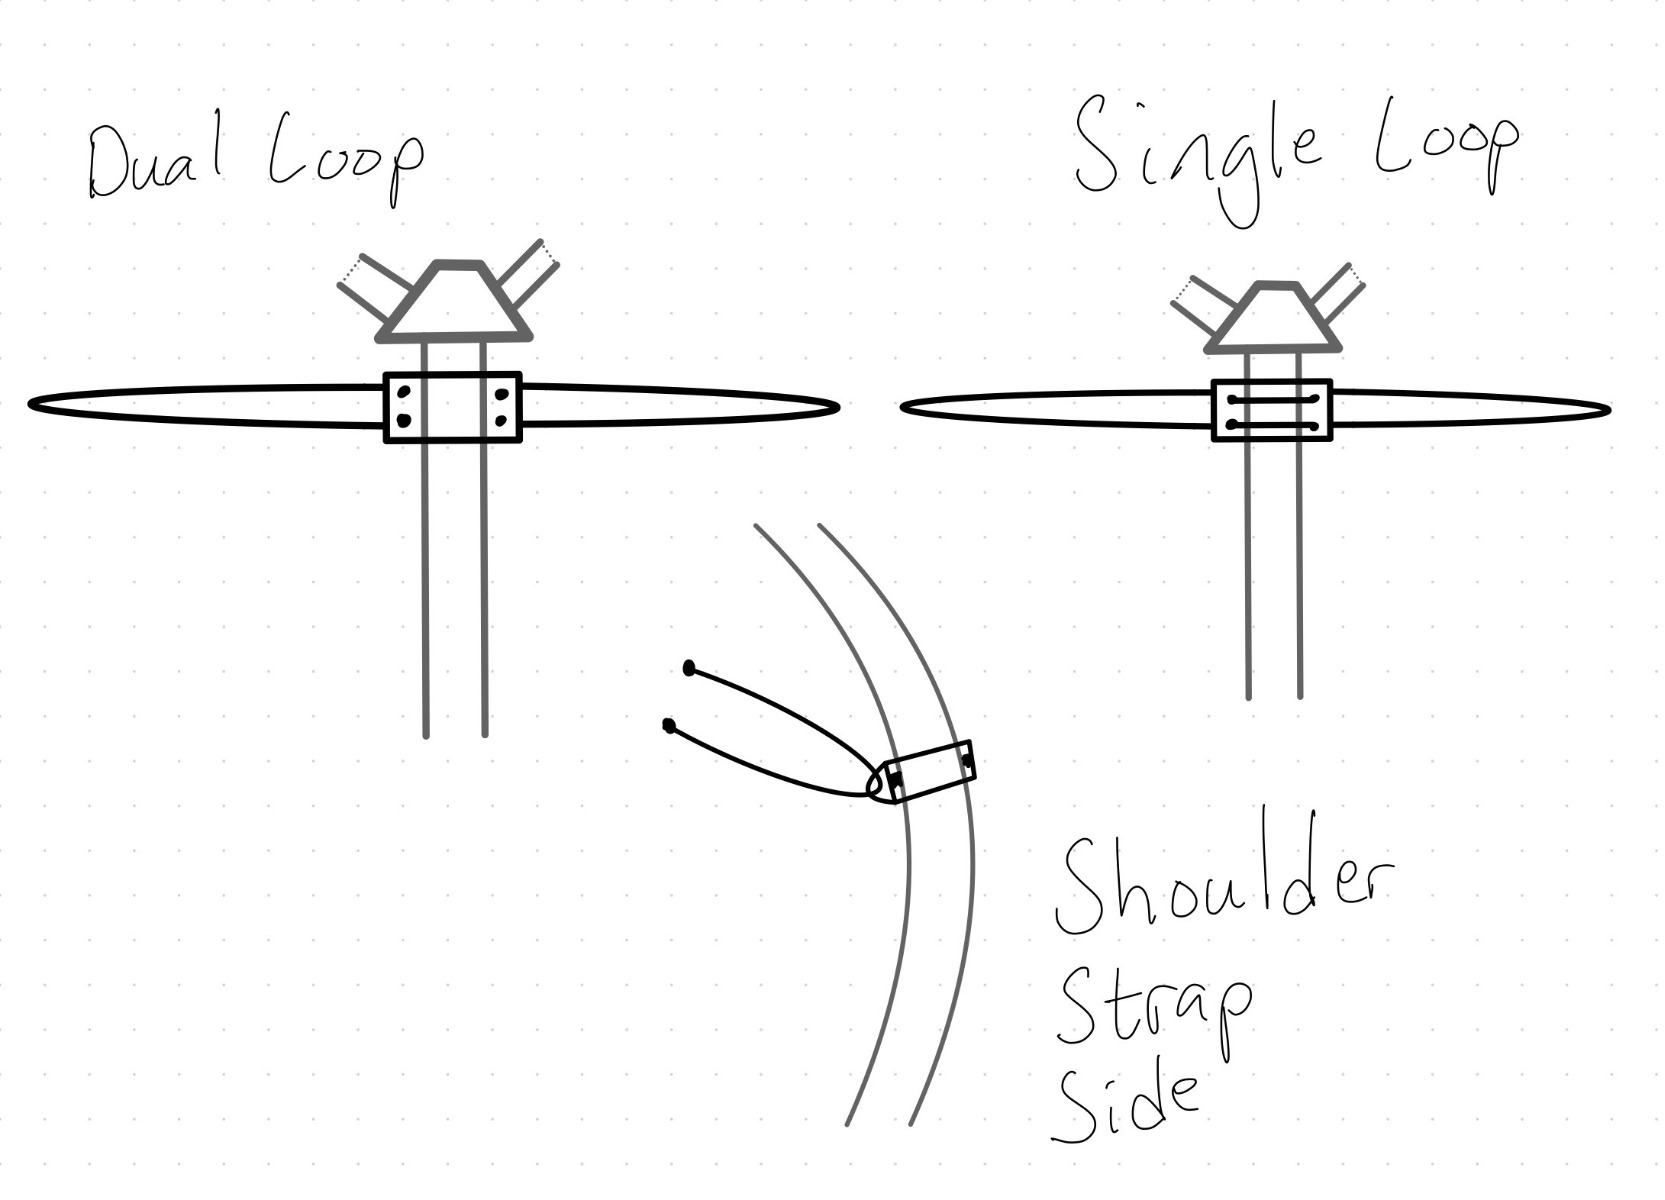 Loop Bungees - Dual or Single
The most commonly used are dual-loop bungees. Creating a redundancy, the loop connects to the harness near the spine and to keep the loop usable it is, for a lack of better words, looped through a specialized keeper on the shoulder strap and then back again to the spine.
A single-loop bungee connects both tanks and runs from one armpit across the back, and then back again.
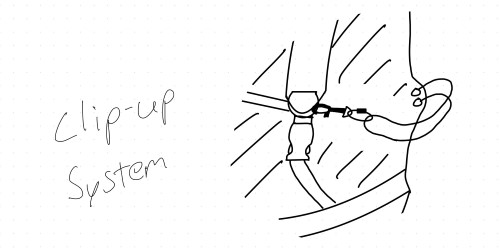
Clip-Up Bungees
Dive Rite developed a clip-up bungee system, and then others followed suit. This system features a clip connected to a metal ring which is then looped through with a bungee allowing the diver to hard clip on the surface and not have to move to the bungee when underwater like with a loop system.
Tank Hardware
An integral, but oft-forgotten part of starting in sidemount is your tank hardware. For those who are already familiar with stage and deco bottles, it may seem trivial but there are a few key differences.
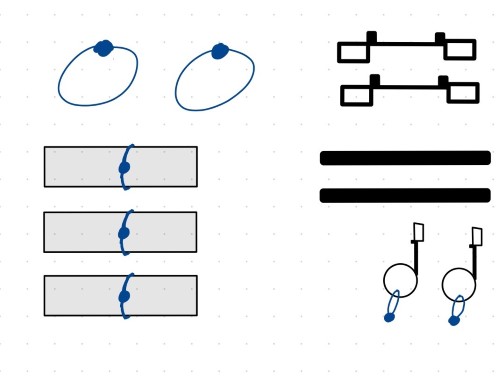
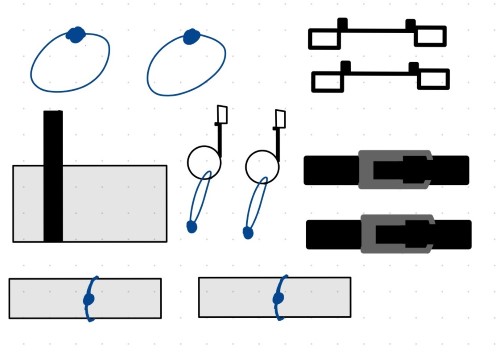
If you are diving loop bungees, the following is the most commonly used and relatively standardized. Keep in mind that bands will vary based on your regulator setup. Assume a long right hose, but we’ll talk more about that later.
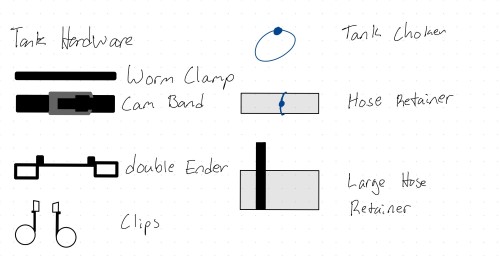
Both tanks will need either a cam-band or worm clamp to secure the bottom bolt snap that clips into the tank. Cam-bands are great when you are getting started as they allow easy adjustments when you’re underwater. If you switch tanks often and constantly move
hardware around this might be the best option. For a more permanent or elegant solution look no further than the worm clamp. Place a worm clamp or cam-band over a short loop of string with an easy-to-use clip to secure the bottom of your tank to the sliding D-rings or other attachment point.
For the top attachment point tie a small loop of rope around the neck of the tank while allowing for a little wiggle room. If you will need to change tanks you can tie the loop large enough so it can slip over the end of the tank valve and come off of the tank.
To secure the hoses you will need hose retainers. They come pre-made or, if you are on a budget, like most of us, you can cut an old car tire inner tube and use it with a loop of bungee to create a pull handle. Some kind of pull is critically important to work your tanks efficiently and effectively. It becomes necessary when you’re working with dry gloves.
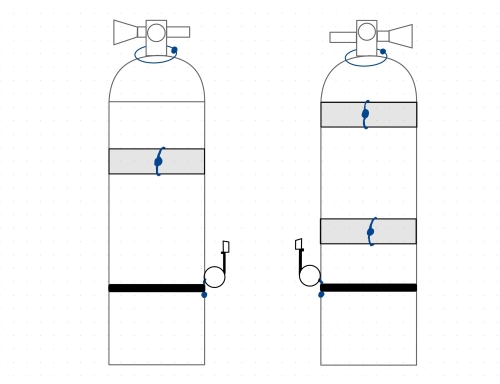
Two bands are required for a long hose and one for the short hose, the hose connecting the first and second stages. We’ll cover this in greater detail under regulators.
When placing your bottom clip the angle on which you place it on the tank depends on the style of the tank. For Aluminum cylinders, the lip gets placed in line with the post (opposite from the valve knob). This brings another distinctive point to sidemount diving: Unique right and left-handed valves.
For those familiar with tech diving, this is like your right and left-handed valves for your doubles; the manifold end is plugged into the tanks and then dove with the regulator up and handwheel on the outside.
While in many places when traveling you may not be able to obtain a right and left valve, having the valve knobs towards the outside and the “post”’ being available to loop the bungee around is the best way to do it.
If you are using a clip system, they are set up much like a stage/deco kit but in reverse on the tank. There are a couple of great videos out there depicting this setup. Again have hose retainers as needed with a long, short, or combo hose setup.
Take a look at the below diagrams from two potential hardware configurations:
Regulators
Just as in backmounted doubles, sidemount uses a specialized regulator configuration. While there are many variations, thought processes, and procedures, I’ll cover the most common types below.
No matter the configuration you will need at least two first stages, two second stages, two pressure gauges, and assorted hoses depending on the philosophy you choose that resonates with you and your diving style. For the tech guys and gals out there this will be the most similar to what you're diving now.
For the best experience we here at Dive Right In Scuba recommend a 5th port on both first stages. Running a 5th port means that there is a low-pressure port sticking out the top (or bottom depending on how you look at things) with a 9 to 12-inch hose. We recommend this for both drysuit and BCD inflation if capable.
For high-pressure (HP) hoses that connect with your pressure gauges a short 6-inch hose works wonders. Or, if you want some length, 9-inch hoses are good as well. Some people run antennae, meaning their pressure gauges run up and out of the regulators sticking up past the tank instead of down the side of the tank. While this can make your gauges easier to read, we don’t recommend this method as it is easy to get them caught on something or damaged if you're passing through tight restrictions.
Most Common Setup
On the left tank (your left) attach a short hose (26 to 32-inches) to the second stage on a right-angle adapter and a bungee necklace. A 6-inch HP hose connects your pressure gauge and hangs down the tank. Your BCD and/or drysuit hose comes out of the 5th port on a 9 to 12-inch quick-disconnect hose. On the right tank, connect a 7-foot-long hose to a second stage with a tied clip. A 6-inch HP hose connects your pressure gauge and your BCD/drysuit inflation (if that applies to you).
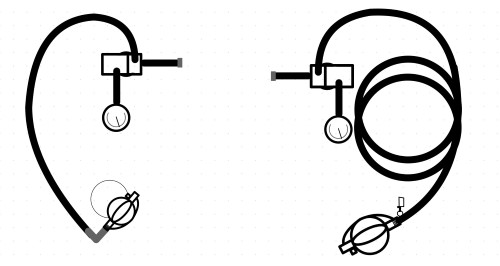
| Left Regulator | Right Regulator |
| 30" LP Hose w/ 90 deg adapter and bungee necklace | 7' or 5' LP hose w/ bolt snap |
| 6" HP hose w/ SPG | 6" HP hose w/ SPG |
| 15"-22" QD hose for BCD | 15"-22" QD hose for drysuit |
Psst, hey tech nerds, you can skip this next jaunt.
When Diving In (we’ve received word from on high that we’re allowed to use this pun once per calendar year) to the tech world, ditching the typical yellow octo on a longer hose can be a bit much. But for backmount and some sidemount configurations the primary regulator is on a long 7-foot hose that wraps around the body.
In an out-of-air scenario where you are donating, you’ll pass the regulator in your mouth to the out-of-air diver, meanwhile, your backup is on a short hose with a bungee necklace that hangs right below the neck. So you’ll pop the backup in your mouth and continue to breathe while you and your buddy resolve the situation.
The philosophy here is that you know for a fact the regulator in your mouth is working. You don’t know, with absolute certainty, that the backup you haven’t breathed off of for a couple dozen dives works. So you pass your, most likely panicked, buddy the working regulator and you use the backup around your neck. The key here is that your backup can never be taken away from you in an emergency.
Other Variations
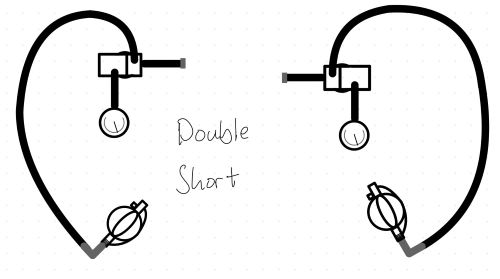
The most common variation we see, particularly in the Great Lakes, is using double-long hoses. The thought process is that I don’t know what tank is going to be lowest when my buddy is going to run out of air. So now I can donate whatever hose has the most air and all is well.
The other variation is a double short hose. Typically there is no bungee on either short hose second stages. The thought behind this is because I'm in sidemount I can donate the tank and hand it off to the other person if they are in an out-of-air situation.
Transmitters
While not as commonly used in sidemount, some divers choose to use transmitters instead of, or in parallel with, traditional pressure gauges. When running parallel there are a few options to choose from.
You can place the transmitter directly on the first stage, this is not as common as the other ways and can lead to a more easily damaged transmitter. Some people like to antenna their transmitters on short hoses, this can run the same problem as fixing your pressure gauges up, causing a snag hazard and a higher risk of damaging them. The third way is to use a high-pressure block that splits the one HP port into two. Then run both down the tank, protecting the pressure gauge and the transmitter.
Accessories
Now that we’ve got the big stuff out of the way we can take a close look at accessories that you’ll often use when sidemount diving.
Butt PlatesWhen diving with steel tanks, or if you need extra real estate for specialized equipment, a butt plate can be a great addition to a sidemount harness. However, not all sidemount harnesses can accommodate a butt plate. |
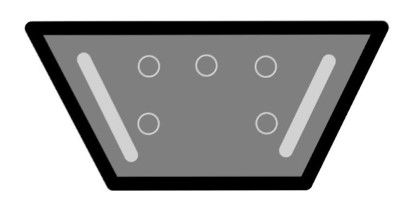 |
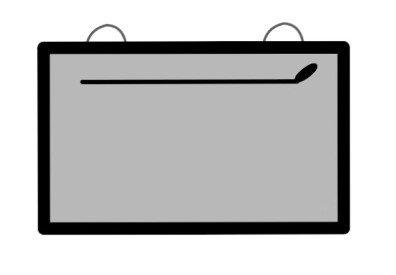
PouchesBecause divers' pockets are often blocked by their sidemount cylinders, it requires extra effort to push the tank out of the way and then reach into the pocket. This oftentimes leads to digging around blind because the top of the tank blocks a line of sight to the pocket. Most sidemount divers use a dedicated pouch to store things like a backup mask, spools, wet notes, etc. Typically a pouch is clipped to the two bent or back D-ring positioning them over the butt. The pouch can then be unclipped and re-clipped to the divers’ shoulder D-ring, providing an easily viewed and accessed storage option. |
 |
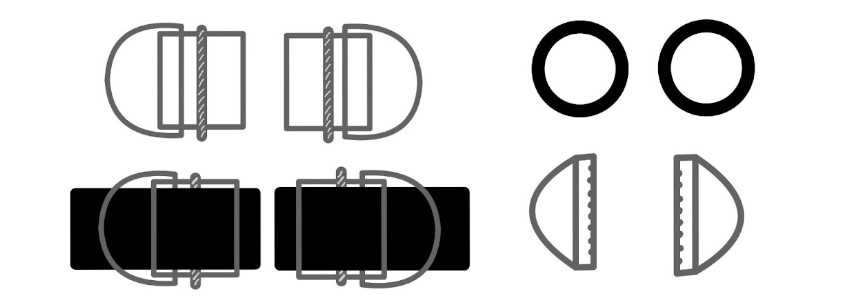
Sliding D-ringsWhen diving aluminum, a good sliding D-ring is essential. This allows the cylinder to be pushed back and forth on the waistband to ensure the tanks are parallel with the body. For steel cylinders, a fixed D-ring is optimal as a moving D-ring will often slide down on its own. |
 |
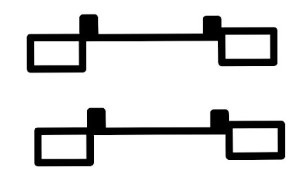
Double Enders For EntriesThis is an often overlooked and easily forgotten aspect of equipment in the sidemount world. You can use a solid set of easy-to-use double enders when walking or jumping off a boat or dock with loop bungees. This will help to not stretch out or break the bungee loops. However, if you’re diving using a clip-off system, you do not need this. |
 |
Argon/Aux Drysuit InflationWhile argon is going out of style when diving with helium mixes, it can still be used to add a redundant inflation source. You can mount argon or an auxiliary drysuit inflation bottle in a few different ways. A majority of divers, particularly around the Great Lakes will mount it to the crotch strap with a specialized plate and bungee. The other common method is to mount it to the inside of the wing. This, however, means that you cannot turn off the bottle if something were to happen. |
 |
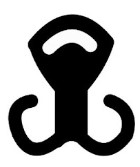
Wing Bungee HookThe Wing Bungee Hook offers a secure and streamlined alternative to traditional bolt snaps for connecting the bungee cord on a sidemount diving wing. Its smooth, contoured design ensures a comfortable fit against the diver's body while minimizing potential snag points. This type of bungee hook is favored by some divers for its ease of use and clean, minimalist appearance. |
 |
Technical Sidemount Diving
While there are a lot of similarities between recreational and technical sidemount diving, there are a few key differences, starting with hardware. We’ll get into it below.
Tank Hardware
The bottom clip is placed in line with the regulator, the hardware is the same for both the right and left tanks. On top is a piece of bungee with two loops on it, one for the tank and the other to hold the clip in. On the bottom, place the cam-band or worm clamp a palm-length above your primary tank’s cam or worm clamp. Then create a long bungee at least the length of your palm with a clip attached to the end. Place the bungee under the cam/worm clamp. Use one hose retainer placed midway between the crown of the tank and your cam/worm clamp.
Regulators
Because of the unique right/left configuration, when dealing with more than one deco or stage bottle, it is common practice to use right and left stage kits. The left side is almost always identical to the regular backmount stage.
Tech feel free to skip this part.
Stage regulators are typically set up to only be used on the left-hand side of the body. A first stage connected via a 26 to 32-inch hose is used along with a 6-inch HP hose with the pressure gauge attached is all you need.
For staging sidemount bottles, because the bottle sits below your primary, the hose may need to be a little longer than your standard backmounted bottles. Always hold your regulators up and try different hose lengths to determine the correct length before you get wet.
For the right-sided regulator, however, there are two schools of thought.
Left StageThe left stage is almost identical to the regulator backmount stage with the exception of a turret first stage to allow rotation of the hose.
|
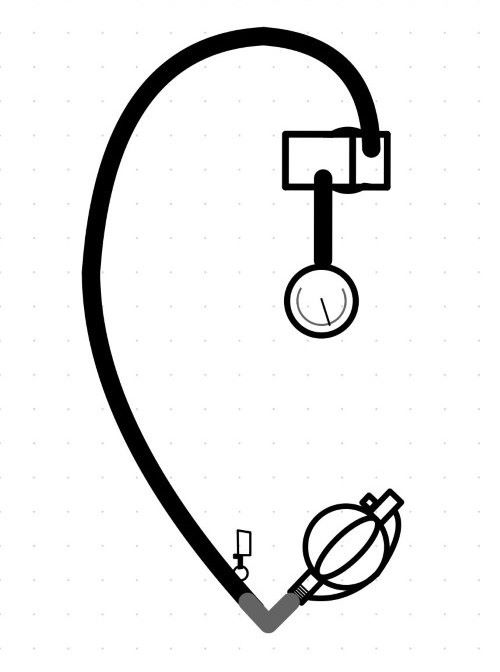
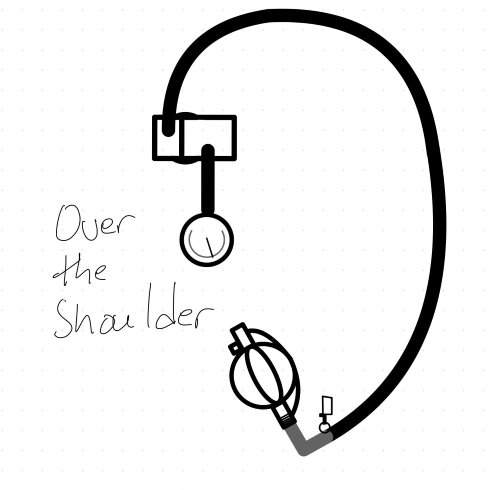
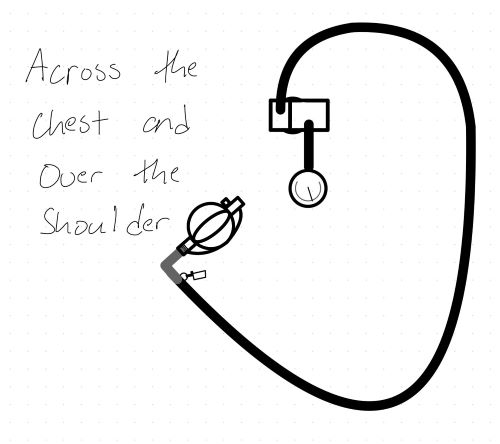
Right Stage - Method OneMirror what we do on the left side with a left-handed regulator. Run the hose up and across the back then to you. This does require a right/left exchangeable regulator. |
Right Stage - Method TwoGrab a slightly longer hose and run it across your chest, over your back, and then to you. This does not require a left-handed regulator and keeps the muscle memory of always having your regulator clipped to your right D-ring. It is recommended that you use a swivel for the right-hand side, but this is not mandatory. |
 |
 |
 |
Accessories
Let’s take a look at some of the accessories that you’ll need to pick up for your technical sidemount diving adventure.
Argon/Aux Drysuit Inflation
While argon is going out of style when diving with helium mixes, it can still be used to add a redundant inflation source. You can mount argon or an auxiliary drysuit inflation bottle in a few different ways. A majority of divers, particularly around the Great Lakes will mount it to the crotch strap with a specialized plate and bungee. The other common method is to mount it to the inside of the wing. This, however, means that you cannot turn off the bottle if something were to happen.
Cutting Devices
This can get a bit tricky as you need to place a cutting device above your chest. There are two common places. The shoulder strap is one of them, and you can place a line cutter, knife, or shears above the chest D-ring. The other place is either on the computer strap or another wrist placement.
Canister Lights and Headed Suit Batteries
Placing these is a bit different for sidemount diving. The classic placement, on the waist strap, used during backmounted doubles is no longer possible as the sliding D-rings or heavy steel tanks get in the way. On some sidemount harnesses, you can attach a specialized plate on the crotch strap using a bungee. This typically requires a longer cable to the head and a 90-degree adapter on the can to orientate the hose so you can produce a streamlined system. Another way is to bungee them to the spine or inside of the BCD/harness. This means that you cannot turn the battery pack on and off but it does keep the crotch strap clear of another piece of equipment.
Backup Lights
Some people like to use their pockets and pouches to carry their backup lights. Another common way is to stick with a Doing It Right (DIR) mindset and mount them onto the shoulder straps, clipping them up to the D-ring on a bungee or rope to keep them tucked to the side. Then you can use a bicycle tire innertube to keep the bottom of the light held tightly to the webbing.
Now For the Fun Part: Diving!
Is your head spinning from all that gear talk? Fear not, we’re about to head into the water. Well…almost. Let’s start with education.
Classes
To get into sidemount diving you’ll first need to take a sidemount class. There is one huge thing to note: Your instructor matters more than the agency. I have been diving since I was 10 and have PADI, SSI, SDI, and TDI certifications. So finding a good instructor can be tricky, particularly if your go-to dive shop does not provide a sidemount course.
There are a couple of signs of a good instructor. Ask them about the diving they do. A technical diver, particularly a trimix or cave diver, has gone through a more rigorous training regimen than a typical recreational instructor. Another thing to look for is an instructor who regularly dives sidemount. Sometimes instructors can be certified to teach sidemount but if they don’t regularly dive sidemount they may not be the best instructor for you. Ask a sidemount-certified buddy if they had an enjoyable experience with their sidemount instructor and class. We here at Dive Right In Scuba offer both SDI/TDI Sidemount Diver Courses and PADI Sidemount Diver Courses, so you can explore the one that best fits your goals.
Ways To Dive
Let’s start with the most common and, well, normal way. You’ve got your sidemount BCD of choice, two tanks, along with right and left-handed valves and regulators.
Monkey Diving
This is simply diving with one tank. It can be easy to become lopsided, but you can minimize this by placing weight on the other side. This technique is often used as a part of passing a restriction or during open water dives.
No Mount Diving
Consists of either strapping tanks together or handling one at a time. This allows divers to push tanks ahead of themselves when passing through a tight restriction.
Technical Sidemount Diving
This is typically defined as sidemounting in an overhead environment or diving with stage or deco bottles.
As a note from the DRIS staff. Please be careful when trying a new style of sidemount diving. We recommend additional instruction from someone who knows and has experience with diving in that style.
Passing Restrictions
If you are planning on passing through restrictions, ask your instructor to walk you through the proper procedures. One of the many advantages of sidemount diving is that you can remove and adjust your cylinders to give yourself a smaller profile. Some ways to do this include unclipping your bottom attachment point and swinging one or both in front of your body, removing one or both cylinders entirely, and placing one cylinder on your butt D-ring to allow it to sit between your legs as you kick.
Wrapping Up Our Sidemount Dive
We've come to the end of our venture into the open waters of sidemount diving. From gear choices to diving styles, you've gotten a taste of what it takes to make the switch. Whether you're drawn in by the freedom of movement or the ease of tank handling, remember, sidemount diving is a journey, not a destination. It takes time, practice, and the right instruction to truly master.
So, before you take the plunge, weigh the pros and cons, chat with experienced sidemount divers, and find a reputable instructor who resonates with your diving goals. If you're ready to embrace the challenge and explore a new underwater dimension, sidemount diving might just be the adventure you've been seeking. Dive safe, explore deeper, and always remember, the underwater world is yours to discover.

